Baby Gates for Water Features: Safety Setup
By Nia Okoye • 28th Apr
Water features (indoor pools, fountains, spas, and ornamental water gardens) bring beauty and calm to homes, but they present a drowning hazard that demands serious attention. Moisture-resistant baby gates and aquatic home safety barriers offer a proven way to separate curious toddlers from water risks, yet many caregivers struggle to find or install them correctly. This guide walks you through measuring, selecting, and setting up a gate that protects without creating friction in your daily routine.
Understanding Your Water Feature Layout
Before you shop, map out your exact situation. Water features vary wildly: a ground-level indoor pool surrounded by tile, a recessed sunken spa, a corner fountain in a bedroom, a garden pond on a raised deck. Each demands a different approach.
Assess the opening and approach
Measure the width, height, and depth of the opening or barrier zone around your water feature. Note whether the edge is:
- Flush to flooring (easier installation)
- Raised or sunken (may require custom mounting)
- Near corners, furniture, or architectural quirks (baseboards, quarter-round trim, electrical outlets)
- On tile, stone, or sealed concrete (affects mounting options)
Also consider foot traffic. Is this a high-flow pathway where adults pass frequently while carrying items, or a room rarely entered by caregivers? Does a pet need supervised access? Will grandparents or babysitters use this gate? These details shape whether a one-handed latch and auto-close feature matter, or whether they're essential.
Identify moisture exposure
Water features create splashing, humidity, and condensation zones that extend beyond the obvious water line. Ask yourself:
- Does splashing reach the wall or floor around the feature?
- Is the room consistently humid (spa enclosure, bathroom with fountain)?
- Will the gate stand permanently wet or damp, or only occasionally sprayed?
- Are there freeze-thaw cycles if the feature is outdoors or in a seasonal space?
This assessment determines which materials and finishes will hold up without rusting, corroding, or warping. For wet rooms with tight clearances, see our moisture-resistant tile and kitchen gate guide.
Selecting Moisture-Resistant Materials and Gate Types
Waterproof gate materials fall into a few categories, each with trade-offs:
Stainless steel and aluminum
These metals resist rust and corrosion in damp environments. Stainless steel is heavier and more durable for high-traffic or climbing pressure; aluminum is lighter and easier to install. Both are often paired with powder-coated finishes (typically white, black, or bronze) for additional protection. The downside: both are industrial-looking and can feel cold in a home setting. For a water feature in a living room or bedroom, aesthetics matter (you don't want the gate to feel like a utility barrier).
Plastic and composite frames with metal reinforcement
Modern pressure-mounted gates often use UV-resistant plastic or composite material combined with steel mounting hardware. These handle humidity well and won't rust; they're also lighter and less visually heavy. Downside: prolonged direct sunlight or extreme temperature swings can cause warping or brittleness over years. For indoor water features or shaded outdoor areas, this is a practical middle ground.
Mesh or fabric panels
Retractable mesh gates roll away when not in use, creating zero visual footprint. The fabric resists moisture better than traditional accordion gates, and the hardware is typically stainless. These work well for temporary barriers or open-concept spaces where you want flexibility. Trade-off: mesh can feel less permanent and some toddlers learn to push or climb mesh more easily than solid gates.
Hardwood with water-resistant finishes
Wood gates with marine-grade finishes or lacquer can work near water features if regularly maintained and not in constant wet contact. For a home-integrated look, wood is beautiful, but it demands ongoing care (resealing, checking for swelling). Reserve this for decorative screens or barriers that aren't directly splashed.
Step-by-Step Installation for Water Features
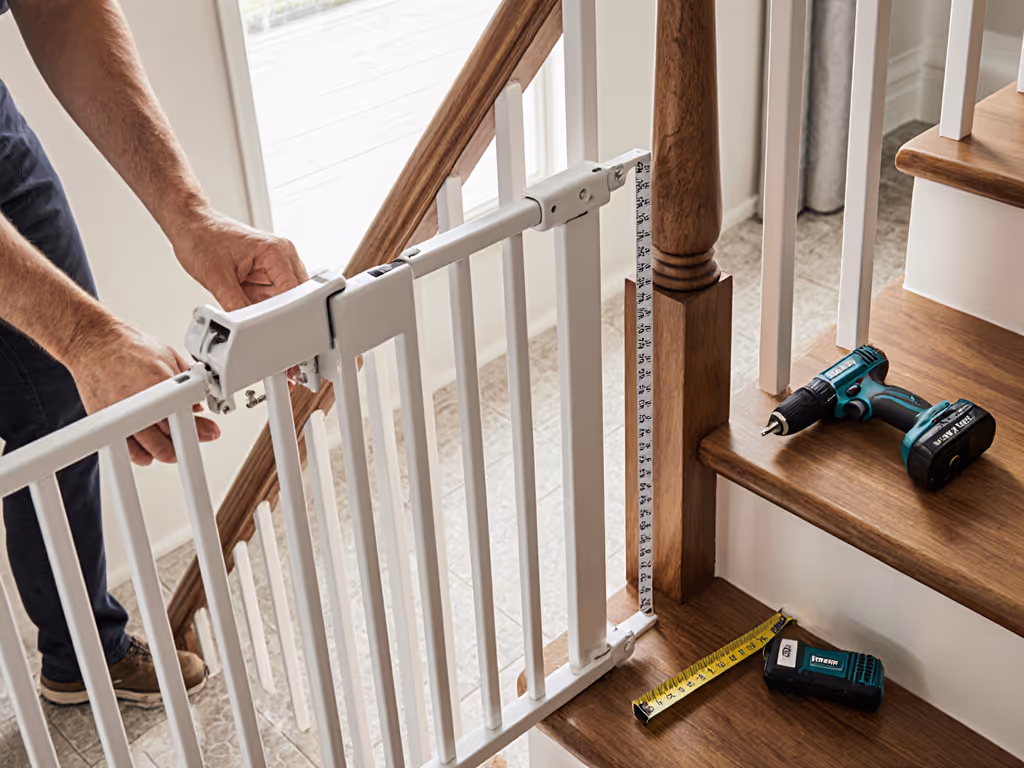
Step 1: Verify your gate choice against your measurements
Order or confirm a gate that fits your opening width and accommodates moisture. Check the product specs:
- Stated width range (e.g., 27" to 42.5")
- Material composition (stainless, aluminum, corrosion-resistant plastic)
- Hardware finish (stainless bolts, not standard steel)
- Whether extensions are available for wider openings
- Latch type (auto-close, manual, one-handed operation)
If your opening is irregular or extra-wide, confirm that extension kits exist before ordering the base gate. Nothing is worse than discovering you need a custom build or adapter mid-installation. For tricky angles and non-standard spans, use our baby gate extensions and adapters guide.
Step 2: Prepare the mounting surface
Moisture environments demand secure, damage-resistant mounting:
- For tile or stone: Use stainless steel anchors rated for your surface. Avoid cheap plastic anchors; moisture causes them to expand and fail. If drilling into tile, use a diamond bit and go slowly.
- For sealed concrete or pool deck: Stainless steel expanding anchors work well. Ensure the concrete is sealed; unsealed concrete wicks moisture and weakens anchors.
- For drywall or plaster near water (not ideal, but common): Reinforce with wooden blocking behind the wall before drilling, or use heavy-duty toggle bolts. Do not rely on drywall anchors alone in a high-humidity zone.
- For wood framing or banister posts: Stainless steel lag bolts into solid wood are the gold standard. Verify you're hitting framing, not hollow space.
Clean and dry the surface thoroughly before mounting. For surface-specific steps on tile, concrete, and banisters, follow our step-by-step installation guide. A clean base makes a stronger, longer-lasting install.
Step 3: Install hardware and test fit
Follow the manufacturer's install guide precisely. Most moisture-resistant installations for water features involve:
- Drilling pilot holes (prevents cracking and splits)
- Using stainless bolts, not standard steel (rust risk)
- Applying a silicone or polyurethane sealant around bolt holes to prevent water seepage
- Checking that all mounting points are tight and level
Before finalizing, swing the gate open and closed several times. Listen and feel: smooth motion, no binding, solid closure.
Step 4: Test the latch and auto-close
If your gate has an auto-closer, adjust the tension so it closes firmly but not violently. A slamming gate wakes children and stresses hardware. A gate that closes too slowly leaves a gap, defeating the point.
Test the latch with one hand while holding an imaginary baby, laundry, or groceries in your other arm. If it's awkward, ask yourself: Will grandma fumble with this? Will I close it reliably every time after a bathroom trip?
Make the safe action the easy one. If the latch is stiff or two-handed, you'll skip it when tired, and that's when mishaps happen.
Step 5: Add visual cues
Place a small sticker, mark, or bright tape at eye level on or near the latch. This cues multiple caregivers that a gate exists and must be closed. In my early infant-room days, we learned that a simple visual anchor (even a colored dot) reduced forgotten gates by half. It's not a substitute for habit, but it bridges moments of distraction.
Building Habit and Testing Your Setup
Once installed, test the gate daily for one week:
- Open and close it 5-10 times per day in normal routines (after meals, before naps).
- Time each close: does it feel automatic yet, or effortful?
- Involve all caregivers: does each person know the latch direction and firmness?
- Check for rust, corrosion, or loose bolts after 3-4 days of moisture exposure.
- Verify that the swing direction is correct (opening away from water, not toward stairs or a hazard).
By day seven, safe should feel automatic, not something you think about, but something your hands do. To balance childproofing with fast emergency exits, review our fire-safe baby gate installation guide. If the gate still feels foreign or forgettable, adjust. Move the handle to dominant-side reach, add a second visual cue, or practice one-handed closes during a calm moment.
Actionable Next Step
Measure your water feature opening today: width, height, and distance from walls or fixtures. Write these dimensions down, photograph the space from multiple angles, and note the surface material (tile, concrete, wood). Then visit one reputable gate brand's website and search for "moisture-resistant" or "outdoor" options in your size. Check whether extensions are available and whether the latch is one-handed. Don't buy yet, just confirm that a suitable gate exists for your exact setup. Once you know a match is possible, installation becomes straightforward, and peace of mind is just one secure gate away.
Related Articles