Choosing Gate for Staircases: A Complete Safety Guide
By Nia Okoye • 24th Oct
Did you know that more than 3,000 children under five are injured on stairs every year in the United States? Every step in your home matters when safety is at stake. The right safety gate can make a world of difference, but finding the best fit means more than picking a product off the shelf. This guide arms you with practical insights for assessing your staircase, choosing the right features, and installing a gate that keeps your family safe.
Quick Summary
| Key Point | Explanation |
|---|---|
| 1. Assess your staircase's safety needs | Conduct a thorough visual inspection and measurement of your staircase to identify potential hazards for gate installation. |
| 2. Identify essential gate features | Determine key features like width, height, material, and locking mechanisms to ensure safety and function in your environment. |
| 3. Choose hardware-mounted gates for stability | Opt for hardware-mounted gates, especially at the top of stairs, to provide maximum stability and prevent dislodging. |
| 4. Follow precise installation instructions | Methodically follow the manufacturer's instructions for installation to ensure your gate functions as an effective safety barrier. |
| 5. Regularly test and inspect gate security | Conduct routine inspections and strength tests to confirm that your safety gate remains secure and effective as your child grows. |
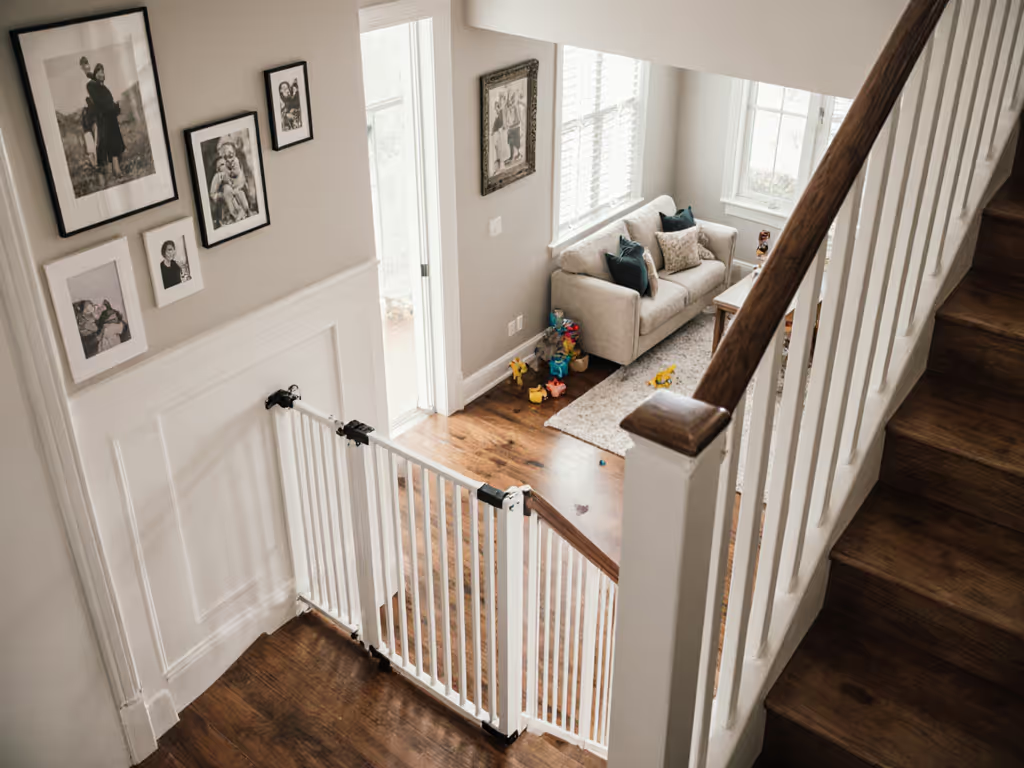
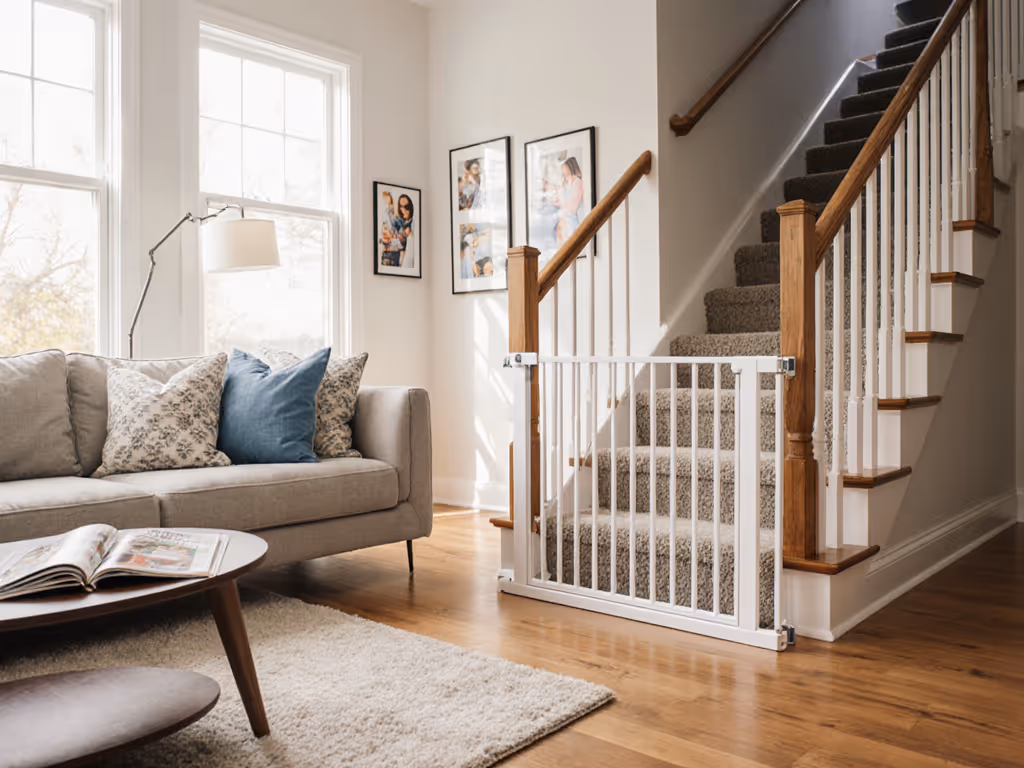
Step 1: Assess Your Staircase and Safety Requirements
You are about to perform the most critical first step in choosing the right safety gate: understanding your specific staircase environment. This comprehensive assessment will help you identify potential risks and select the perfect gate for your home.
Start by conducting a thorough visual inspection of your staircase. Measure the width between the walls or banisters where you plan to install the gate. Standard staircase widths range from 24 to 48 inches, but unique architectural designs can vary significantly. Use a metal tape measure for precision and record these measurements carefully.
Next, examine the surface and structure of your staircase. Check for irregularities like uneven steps, sloping surfaces, or non standard angles that might complicate gate installation. The Health and Safety Authority emphasizes identifying potential hazards such as slippery surfaces or surprising step variations that could impact gate effectiveness.
Pay special attention to the mounting surfaces. Are your walls made of drywall, wood, metal, or stone? Different materials require specific mounting hardware and techniques. Some gates work best with solid mounting points, while others need specialized brackets for unconventional surfaces.
Pro Tip: Take clear photographs of your staircase from multiple angles. These images will be invaluable when consulting with safety gate professionals or comparing potential gate models.
Consider the traffic patterns around your staircase. Do children or pets frequently move through this area? Are there additional obstacles like furniture or decorative elements that might interfere with gate placement? Understanding these dynamics helps you choose a gate with the right opening mechanism and safety features.
Finally, assess the potential fall height and angle of your staircase. Steeper staircases with significant drop distances require more robust safety gate solutions compared to gentler inclines. By thoroughly understanding your specific environment, you set the foundation for selecting the most appropriate safety gate.
Step 2: Measure and Identify Key Gate Features Needed
Now that you have thoroughly assessed your staircase, it is time to determine the critical gate features that will ensure maximum safety and functionality. This step transforms your initial measurements into a strategic selection process for the perfect safety gate.
Start by translating your staircase width measurements into gate size requirements. According to The Stair Barrier guidelines, precise measurements are crucial for selecting the right gate configuration. If your staircase width falls between standard sizes, look for adjustable gates or custom solutions that can accommodate unique architectural spaces.
Consider the vertical height of the gate as a primary safety feature. BabySecure recommends selecting gates with sufficient height to prevent children from climbing over. Typical recommended heights range from 29 to 36 inches, depending on the age and mobility of children in your household. A taller gate provides an additional layer of security for more adventurous climbers.
Evaluate the gate's construction and material strength. Sturdy materials like metal or reinforced hardwood offer superior durability compared to lightweight plastic alternatives. Check the gate's weight rating and structural integrity to ensure it can withstand repeated use and potential impacts.
Pro Tip: Test the gate's locking mechanism before purchase. Look for designs that are child resistant but easy for adults to operate quickly in emergency situations.
Pay attention to mounting requirements that match your staircase surface. Some gates feature pressure mount designs for smooth walls, while others require permanent hardware installation for maximum stability. Your earlier assessment of wall materials will guide this critical decision.
Examine additional safety features like one way swing mechanisms, auto close functionality, and visual indicators that signal when the gate is properly secured. These small details can significantly enhance the overall safety and usability of your staircase gate.
By methodically identifying these key features, you are building a comprehensive safety strategy that goes beyond simple measurement. Your careful approach ensures protection tailored precisely to your home's unique requirements.
Here's a summary of key safety gate features to consider based on your staircase assessment:
| Feature | Why It Matters | Typical Options |
|---|---|---|
| Width Compatibility | Ensures proper fit | Standard (24-48")<br>Adjustable<br>Custom sizes |
| Gate Height | Prevents climbing | 29-36" recommended |
| Material | Affects durability & safety | Metal<br>Reinforced wood<br>Plastic |
| Mounting Type | Impacts stability | Hardware-mounted<br>Pressure-mounted |
| Lock Mechanism | Child resistance & convenience | Two-step lock<br>One-handed open |
| Extra Safety Features | Boosts protection & usability | Auto-close<br>One-way swing<br>No-climb bars |
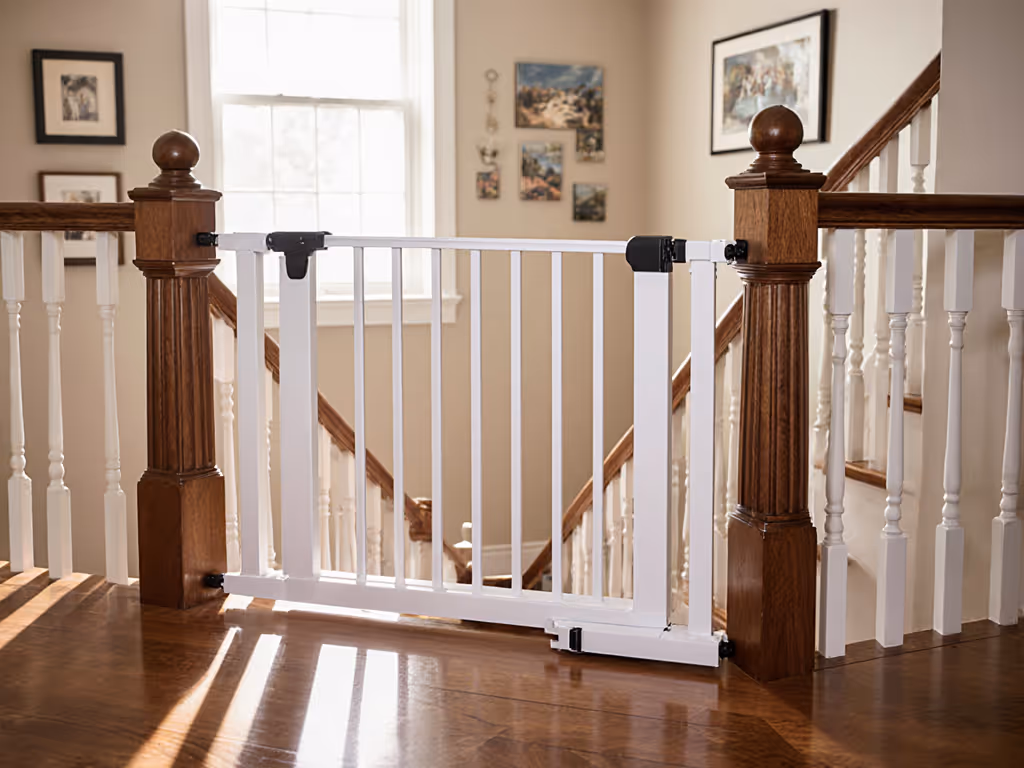
Step 3: Select the Most Suitable Gate for Your Staircase
With your precise measurements and feature requirements in hand, you are now ready to navigate the critical process of selecting the perfect safety gate for your staircase. This step transforms your research into a targeted selection strategy that prioritizes your family's safety.
Prioritize gates with Juvenile Products Manufacturers Association certification. ANB Baby strongly recommends selecting JPMA-certified gates that have undergone rigorous safety testing. These certified gates meet stringent standards for construction, material quality, and overall safety performance.
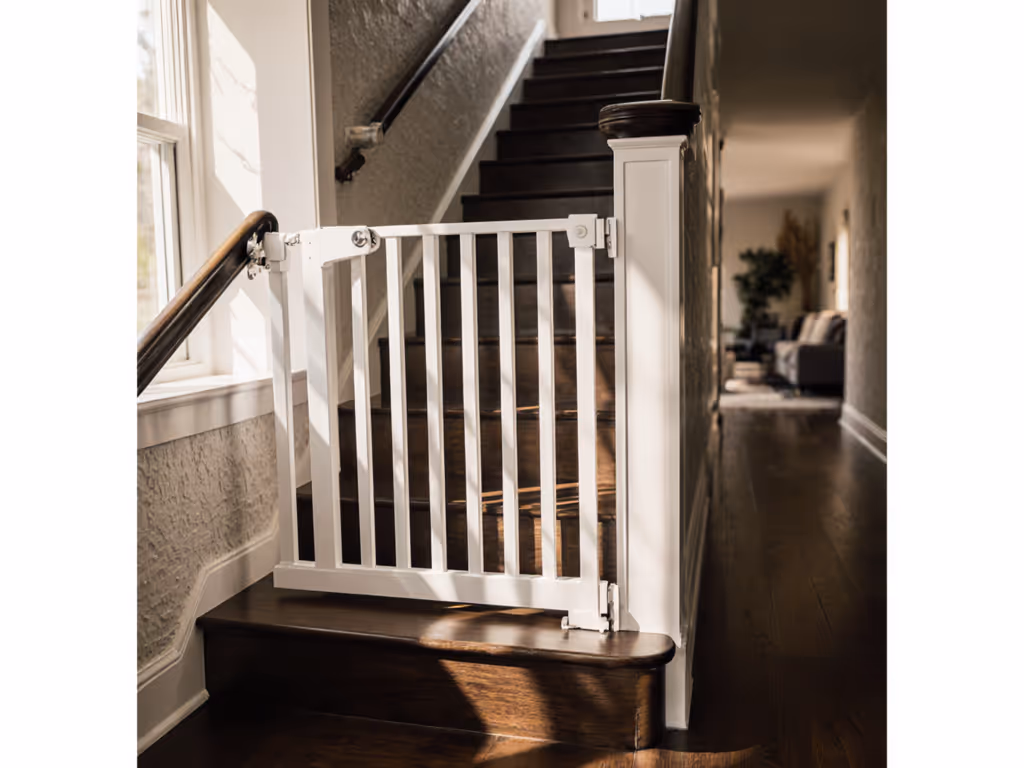
For staircases, Play Kitchen emphasizes the critical importance of hardware mounted gates.
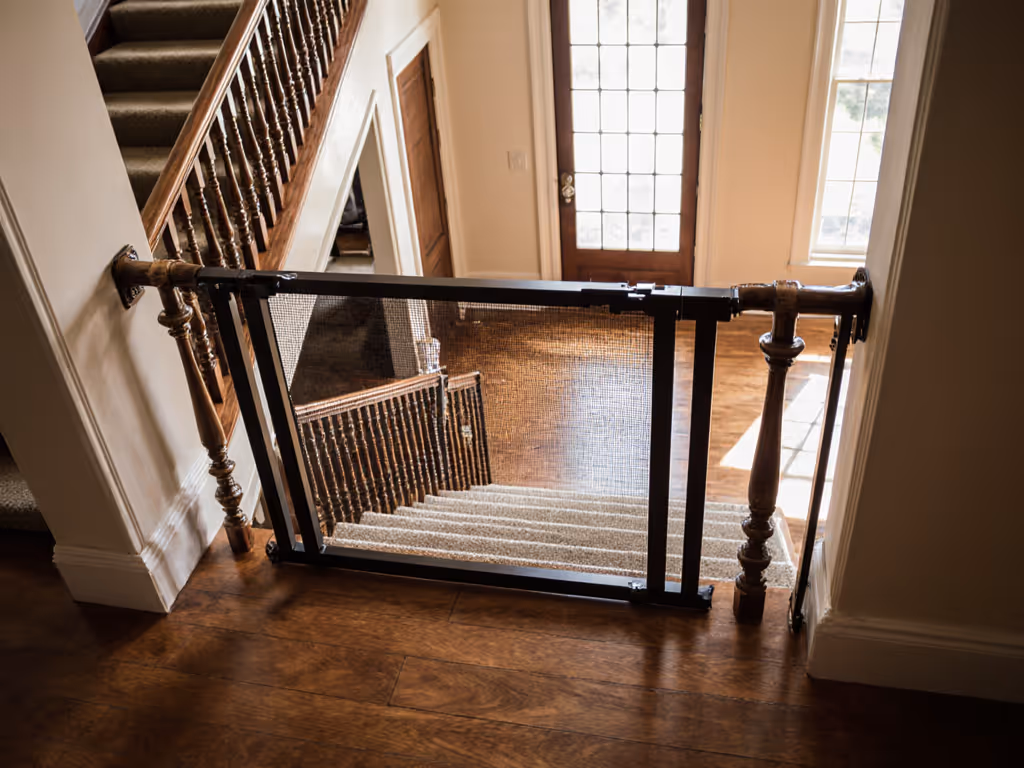
Unlike pressure mounted alternatives, hardware mounted gates provide superior stability and prevent accidental dislodging. When installing at the top of stairs, permanent mounting becomes a non negotiable safety requirement to prevent potential dangerous falls.
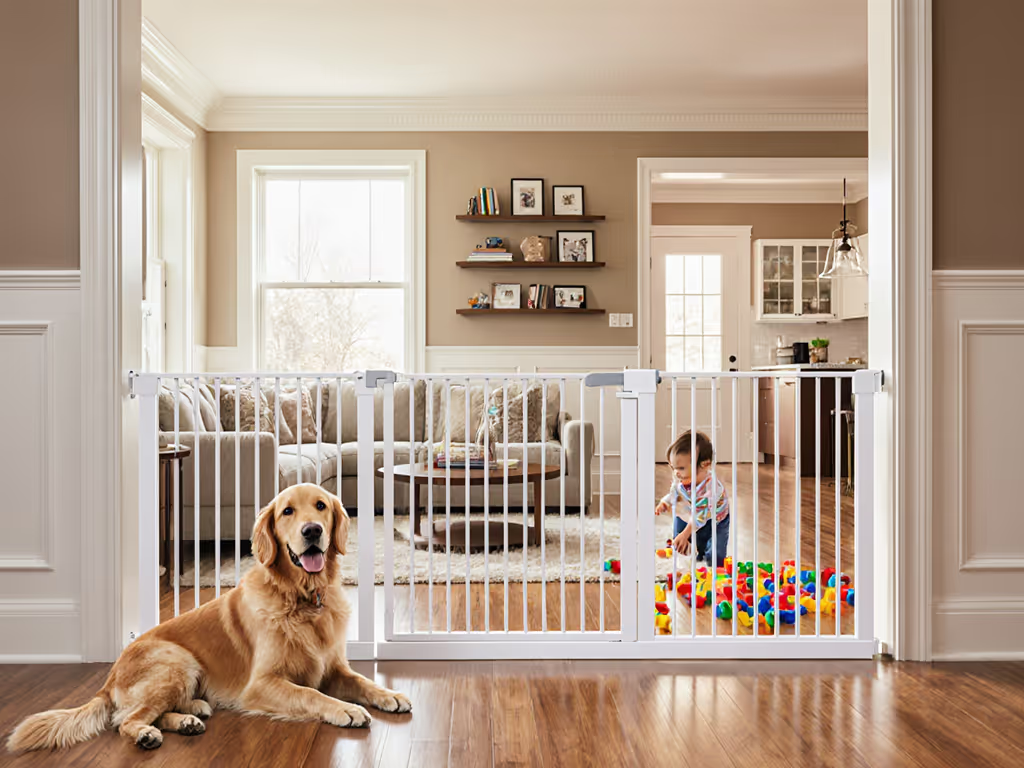
Consider the specific gate mechanism that best suits your household dynamics. Some gates offer one handed operation perfect for parents carrying infants or managing multiple tasks. Others feature walk through designs with built in doors that automatically close and latch, reducing the risk of accidentally leaving the gate open.
Pro Tip: Always check the manufacturer recommended weight and age limits. A gate designed for a toddler might not provide adequate protection for more active or larger children.
Examine the gate's material durability and design compatibility with your home aesthetic. Metal gates offer maximum strength and longevity, while wooden gates can blend more seamlessly with interior design. Consider how the gate will interact with surrounding architectural elements like banisters, walls, and flooring.
Look for additional safety features like no climb vertical bars, smooth edges, and rust resistant materials. Some advanced gates include visual indicators that confirm proper closure and locking mechanisms that require multiple steps to open, deterring curious children from attempting unauthorized access.
By methodically evaluating these factors, you transform gate selection from a simple purchase to a strategic safety investment. Your thoughtful approach ensures a solution that protects your loved ones while integrating smoothly into your home environment.
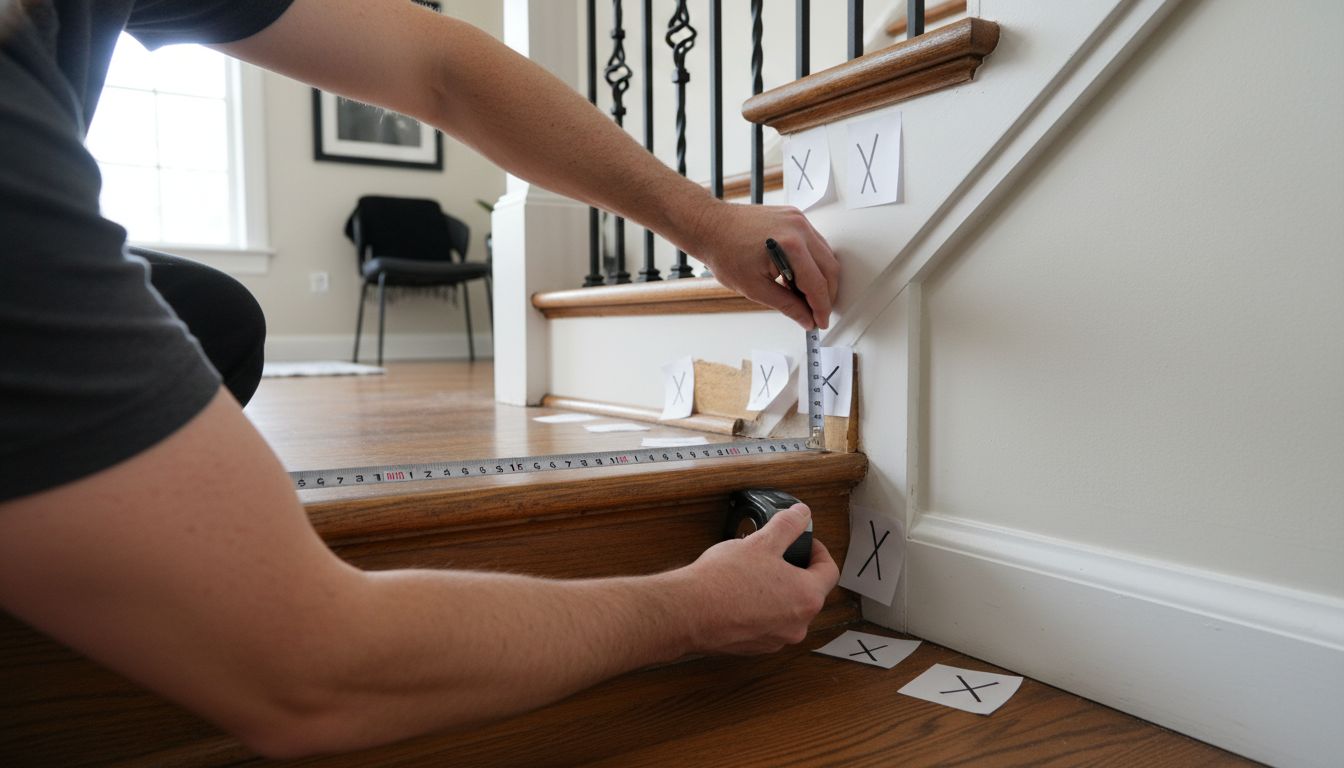
Step 4: Install the Gate Correctly for Optimal Safety
With your carefully selected safety gate ready, you are now entering the most critical phase of your child protection strategy. Proper installation determines whether your gate will be an effective safety barrier or a potential risk.
Begin by thoroughly reading the manufacturer's installation instructions. ANB Baby emphasizes that each gate model has unique mounting requirements that must be followed precisely. Do not rely on assumptions or previous gate installation experiences.
BabySecure strongly warns against using pressure mounted gates on staircases particularly at the top of stairs. For staircase installations, hardware mounted gates with permanent screws are the only acceptable solution. These gates provide critical stability that prevents accidental dislodging during high stress moments.
Gather all necessary tools before starting installation. Typically you will need a power drill, level, measuring tape, pencil, and the mounting hardware included with your gate. Ensure your drill bits match the screw sizes and wall material specifications.
Pro Tip: Always test the mounting surface strength before drilling. Some wall materials like drywall might require additional reinforcement or specialized mounting anchors to support the gate's weight.
Measure and mark mounting points with extreme precision. Use a level to ensure your gate will be perfectly straight both horizontally and vertically. Slight misalignments can compromise the gate's structural integrity and create potential safety gaps.
When drilling mounting holes, go slowly and carefully. Select drill bits that create clean holes without causing unnecessary wall damage. If you are uncertain about your drilling technique, consider consulting a professional or requesting assistance from someone with experience.
After mounting, perform multiple safety tests. Gently but firmly pull and push the gate to verify its stability. Check that the locking mechanism engages smoothly and remains secure under pressure. Your goal is a gate that feels rock solid and shows no signs of wobbling or shifting.
By meticulously following these installation guidelines, you transform a simple safety product into a reliable protective barrier.
Your careful approach ensures maximum safety for your most precious family members.
Step 5: Test and Verify Gate Security Thoroughly
You have reached the final and perhaps most crucial stage of your safety gate installation. Testing ensures that all your careful planning and precise installation translates into a genuine protective barrier for your family.
Play Kitchen emphasizes the importance of comprehensive gate testing immediately after installation. Begin with a visual inspection, checking that all mounting points remain firmly secured and show no signs of loosening or structural compromise.
Apply progressive pressure testing to evaluate the gate's stability. Start with gentle pressure applied from multiple angles simulating potential child interactions. Push against the gate horizontally and vertically to simulate the unpredictable movements of curious children. The gate should remain completely rigid without any noticeable wobbling or flex.
Test the locking mechanism meticulously. Open and close the gate multiple times to confirm smooth operation. Verify that the latch engages fully and requires deliberate adult action to open. Children should not be able to accidentally release or manipulate the lock.
Pro Tip: Simulate real world scenarios by having an adult attempt to simulate a child pushing or pulling the gate with varying levels of force. This practical test reveals potential weak points in your installation.
BabySecure recommends establishing a routine inspection schedule. Check your gate monthly for any signs of wear loose screws or potential structural fatigue. Pay special attention to areas experiencing frequent use or high traffic.
Consider conducting periodic strength tests as your child grows. What worked for a toddler might require adjustment for a more active preschooler. Regularly reassess the gate's effectiveness and be prepared to upgrade or modify your safety setup.
Document your installation and testing process. Take photographs of mounting points and keep manufacturer instructions. This documentation becomes invaluable if you need professional consultation or want to replicate the installation in another area of your home.
By methodically testing and verifying your gate's security, you transform a simple product into a reliable guardian. Your diligence creates a safe environment where children can explore and play without unnecessary risk.
Secure Your Staircase with the Perfect Safety Gate Today
Choosing and installing the right safety gate for your staircase can feel overwhelming with so many factors to consider like width compatibility, mounting types, and locking mechanisms. You want to ensure your child or pet stays safe from potential falls but also need a gate that fits your home’s unique architecture and lifestyle. The pain points from measuring irregular staircases to finding a durable, childproof lock are real and deserve tailored solutions.
At Baby Safety Gates World, we understand these challenges and provide detailed guides, trusted reviews, and expert advice focused specifically on staircase safety gates. Whether you need help selecting a hardware-mounted gate that meets JPMA safety standards or want step-by-step installation tips to avoid common mistakes, our platform empowers you to make confident decisions that protect your loved ones.
Ready to take the next step in safeguarding your stairs? Visit Baby Safety Gates World now to explore our comprehensive resources and find the ideal gate designed for your home’s specific needs. Don’t wait for safety to become a concern. Act today to create a secure environment where your children and pets can explore freely with peace of mind.
Frequently Asked Questions
How do I assess my staircase to choose the right safety gate?
Conduct a thorough visual inspection of your staircase, measuring the width between walls or banisters where the gate will be installed. Take note of any irregularities like uneven steps or sloping surfaces that could impact functionality.
What key features should I look for in a safety gate?
Consider crucial features such as width compatibility, gate height, material strength, and mounting requirements. Prioritize gates with a height of 29 to 36 inches for climbing prevention and select materials like metal or reinforced wood for durability.
How do I properly install a safety gate on my staircase?
Read the manufacturer's installation instructions carefully and use hardware-mounted gates for optimum stability, especially at the top of stairs. Measure, mark, and drill mounting points precisely to ensure the gate is straight and secure.
What testing should I perform after installing the safety gate?
Conduct a comprehensive visual inspection followed by pressure tests to check for stability and strength. Ensure the locking mechanism operates smoothly and requires deliberate adult action to open, safeguarding against accidental release by children.
How often should I inspect my stairgate for wear and tear?
Establish a routine inspection schedule, checking the gate monthly for loose screws or structural fatigue. Regularly assess its effectiveness, especially as your child grows, and be prepared to make adjustments if necessary.
What should I do if my child has outgrown the safety gate?
Evaluate whether your current safety gate still meets the safety needs of your child as they grow. Upgrade to a sturdier gate or modify your setup based on your child's age and activity level, ensuring ongoing protection as they become more mobile.
Related Articles